Overall the group and myself are over the moon with how the animation turned out. We have put so much hard work in over the semester individually and I believe it really shows in the final animation. I think we have all learnt that lighting and textures play a massive part in the animation, especially as we were trying to create life like, beautiful scenes.
I can't really think of too many things that I would have done differently or that I am not very proud of. If anything, I think maybe we could have experimented with different transitions and the order of the clips, but this really is just a minor clip. I would love to carry on with this and begin to broadedn each scene with more animating and more things happening.
I think it was a wise choice to steer clear of characters as making a realistic person takes a huge amount of time, this is time that we didn't have.
I modelled both pier scenes, highlands house and the station scene. The station scene was rather last minute, but I'm so glad I managed to finish it as I think it turned dout very well. I am most proud of this piece.
I really enjoyed working in a group as we could all bounce ideas off of each other to get the best. It also helped that we could concentrate individually on each scene and really spend some time getting it to look good. Eveyrone completed their scenes to a very high standard and they all blend in as well as each other.
I really improved my skills during this project and I also learnt some new skills. I have learnt how to create a realistic spotlight, by adjusting colour, coning and feathering. I learnt that grabbing the viewers attention is one thing, but holding it througout the animation is another. Ours was perhaps one of the shortest animations, but I really think it had the best impact. Each scene was a maximum of 10 seconds long as not to bore the audience. This was done on purpose.
I think as a group we met the brief by creating a high quality animation that will show off the beauty of essex and all the exciting attractions and encourage tourism in the county. We wanted to show that Essex is a promising place for all age ranges and ethnicities and I believe we did that.
We all look foward to seeing it on the visit essex website.
Thursday, 9 December 2010
Final Video...
The final video was exported in F4-LV in 720 HD. We had a few issues to start with for example the video was jerky when it played back. We tried alot of different settings for this and managed to fix it to give a high quality, smooth animation.
The animation is here to see....http://www.youtube.com/watch?v=e5_VEc5VGu4
The animation is here to see....http://www.youtube.com/watch?v=e5_VEc5VGu4
Video editing software...
All the group had compiled 15 clips each. We now had the task of importing them into Adobe Premier, a programme in which we had little knowledge. As there was only going to be the one final animation, we had to work as a team and put of our ideas together, such as order of clips, text, font, transitions and other various features.
The programme is fairly self explanatory and easy to pick up. We had to import the files, click and drag to the time line, adjust the length and speed of the clip and render it. We went for fade trasitions between clips as this is a professional looking way of joining seperate videos.
The next thing we had to choose was the theme song, A few of hours spent a long time searching the internet for suitable soundtracks, We wanted something that had no words and was both calm, yet exciting. A perfect way to describe Essex. The song we chose was calm toward the beginning, but as the video went on and the activities became more exciting, a beat kicked in. I think this worked very well. The track was adjusted and moved so that it would fit in with the clips and fade out perfectly at the end.
Rendering...
Now i had completed all modelling, animated each scene and set up the lighting and was happy, I could begin to render each clip. We Wanted to have an amazing quality video so chose HD. We went for 1280x720 which is perfect for common computer screens (where it will be commonly veiwed) and still keeps the rendering time slightly less. Once we were happy with the render settings we began to render. I was very surprised at how long each render took. The scenes that featured water took upto 9 hours to render a 6 second clip!
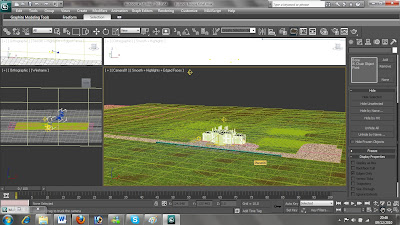
Lighting of Hylands house....
Now I can concentrate on applying some lights to achieve the spot lit effect. I started by apply 2 very dim omnis above the house to light the scene up slightly so the veiwer can see whats going on. Now I can add 3 spotlights, positioned on the ground to light up the building. I have coloured them so it gives a true incandescent effect.
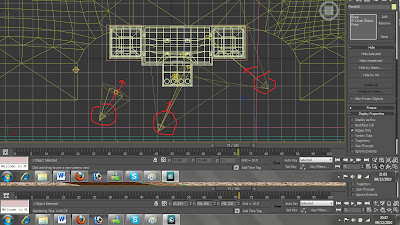
The screenshot shows where lights are pointing and how wide the beam is. I am veyr happy with how this turned out. The spotlights create some atmospheric shadows and make the house looks very grand and tall, exactly the look I wanted to create. Here is a final image taken straight from the video:
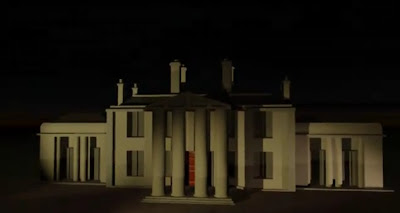

The screenshot shows where lights are pointing and how wide the beam is. I am veyr happy with how this turned out. The spotlights create some atmospheric shadows and make the house looks very grand and tall, exactly the look I wanted to create. Here is a final image taken straight from the video:

Modelling Hylands house....
Now I had a few reference photos I could being to start modelling. As always I began with the maing feature in the scene. This time the house would be first.
I started to model half of it using a rectangle and extruding, insetting and chamfering polys and edges.
I could now use the symmetry tool to mirror the other side of the house. I have to open up the editor and adjust which axis I want to mirror along and then move the mirror.
I could now create the ground that it would sit on. The house sits along a gravel driveway with grass infront and behind it. I did this the same way as in the models before, by creating a thin box and adding a material to it. A bump was added with the same bitmap to give a realistic bump for both the gravel and the grass.
I also added a smoke bump to the gravel to make it a bit more realistic.
The next job was to add a material to the house. The hardest part was getting the windows to look realistic. I wanted them to be dark yet still reflect the surroundings. I decided to add a ray trace reflection to them and tint it slighlty so it reflected much darker than the surroundings.
As it reflected it showed that there was nothing opposite the house as this was out of shot. I added another 2 more planes, one behind the house, one infront, and assigned another sunset scene to them so it appeared that the windows were reflecting the opposite horizon too.
I am pleased at how this turned out. This was the modelling complete.
I started to model half of it using a rectangle and extruding, insetting and chamfering polys and edges.

I could now use the symmetry tool to mirror the other side of the house. I have to open up the editor and adjust which axis I want to mirror along and then move the mirror.

I could now create the ground that it would sit on. The house sits along a gravel driveway with grass infront and behind it. I did this the same way as in the models before, by creating a thin box and adding a material to it. A bump was added with the same bitmap to give a realistic bump for both the gravel and the grass.

I also added a smoke bump to the gravel to make it a bit more realistic.
The next job was to add a material to the house. The hardest part was getting the windows to look realistic. I wanted them to be dark yet still reflect the surroundings. I decided to add a ray trace reflection to them and tint it slighlty so it reflected much darker than the surroundings.

As it reflected it showed that there was nothing opposite the house as this was out of shot. I added another 2 more planes, one behind the house, one infront, and assigned another sunset scene to them so it appeared that the windows were reflecting the opposite horizon too.

I am pleased at how this turned out. This was the modelling complete.

Hylands house...
I chose to model Hylands house as it is situated in Hylands park, home of the V-festival! This attracts people to the park and shows how diverse the park, and the county, is. Not only is it a very lively, popular home to one of the worlds largest music festivals, but it is also home to a 300 year historic house. This attracts a wide range of people in their tens of thousands every year!
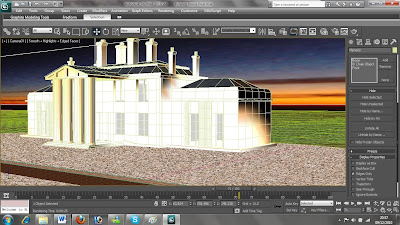
I wanted to model Hylands house at night as it looks so spectacular and grand with the spotlights shining on the white paint work at night.

I wanted to model Hylands house at night as it looks so spectacular and grand with the spotlights shining on the white paint work at night.
Animating the scene...
Now i had modelled the scene I can begin to animate it. The camera is fairly simple and will pan along the pier, then zoom into the sunset. This scene will be 200 frames long which equates to roughly 6 seconds and 30 fps.
During the scene I want the water to move and look like it is real. To do this I set a key frame at the beginning. This determins where the movement will start. I then opened up the material editor. Under the noise bump there is a usefull function called phase. This determines where the noise will appear. The default is set at 0, so I increased it to 3 and set another set another key frame at frame 100. I then adjust it again to 6 and set another key frame at frame 200. This is the perfect speed for the water to look calm and moving slightly with the wind.

I also rendered anothe scene. this time looking toward the seafront form the pier. I used all the same modeling. I deleted the evening sun omni and inserted a very high up, low light omni that would immatate the moon. I placed a sphere, wrapped in a moon surface, infront of it to make it look realistic. The omni glowed around it and gave the effect of a crisp winters evening by the seafront. Exactly what I was after. The omni also reflected off of the water.
To create the seafront I just used a plane, with a bitmap image of the seafront lights on it. As the water moves, this gives the affect of a busy seafront with glistening lights.

Modelling southend pier...
I began by starting to model the platform. I used a box with a large number of segments so that i could add detail by extruding etc... Here is a section of the pier:

I could now copy this many times to create a long pier all with the sam intricute detail. To copy, I held shift and moved the segment along. I also added some street lamps, bins and benches to make the model more intricute and mroe life-like.

I did the same process to create the large open area at the end of the pier. Here is the pier in all it's glory:

Next up I wanted to put some materials to the pier. I used the sub/divided material option again to choose different polys to assign materials to. This means I could change different parts of the pier. For example, the pier legs were materialised using a texture I modified in Photoshop. I got an image of old wood and then tinted the bottom green to look like algae.

No UVW unwrap was needed for this as it seemed to fit perfectly as it was. Here is the pier with the materials added.

I used a wooden plank texture for the pier walk way. I added a bump with the same bitmap and set it to fairly high. This turned out very well and looks realistic.

Now I have to concentrate on the omni lights. I needed to put one in to create a sunset that gives out an orange/yellow/pink light. I also put another one in, closer to the scene and assigned a glow affect to it. This made it look like a hazy sun set. The pink and yellow lights combine to give a fantastic evening effect.

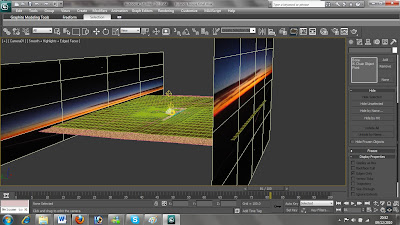
I could now create the water. I did this by creating a large plane and assigning a material to it. The material has a noise bump on it at the correct size to make it look like calm water. The water also has a reflection raytrace. This reflects surroundings to give a very realistic effect. The water is also slightly coloured to a brown/green colour which shows up in places of shadow. The water at the moment looks very blue, but this is because there is nothing for it to reflect as the sky is not in place.


You can see how the lighting is working on the water.

Now i need to create a sky. As the water is going to be reflecting the sky and all surrounding, It needs to be all over the top, like a real sky would be. To do this I created a cylinder big enough to cover the whole scene. In the drop down menu, in th editor I changed it to 'standard' which allows you see inside it in perspective mode. I then found an evening sky image and assigned it to the cylinder. Here is the complete scene.


I could now copy this many times to create a long pier all with the sam intricute detail. To copy, I held shift and moved the segment along. I also added some street lamps, bins and benches to make the model more intricute and mroe life-like.

I did the same process to create the large open area at the end of the pier. Here is the pier in all it's glory:

Next up I wanted to put some materials to the pier. I used the sub/divided material option again to choose different polys to assign materials to. This means I could change different parts of the pier. For example, the pier legs were materialised using a texture I modified in Photoshop. I got an image of old wood and then tinted the bottom green to look like algae.

No UVW unwrap was needed for this as it seemed to fit perfectly as it was. Here is the pier with the materials added.

I used a wooden plank texture for the pier walk way. I added a bump with the same bitmap and set it to fairly high. This turned out very well and looks realistic.

Now I have to concentrate on the omni lights. I needed to put one in to create a sunset that gives out an orange/yellow/pink light. I also put another one in, closer to the scene and assigned a glow affect to it. This made it look like a hazy sun set. The pink and yellow lights combine to give a fantastic evening effect.

I could now create the water. I did this by creating a large plane and assigning a material to it. The material has a noise bump on it at the correct size to make it look like calm water. The water also has a reflection raytrace. This reflects surroundings to give a very realistic effect. The water is also slightly coloured to a brown/green colour which shows up in places of shadow. The water at the moment looks very blue, but this is because there is nothing for it to reflect as the sky is not in place.


You can see how the lighting is working on the water.

Now i need to create a sky. As the water is going to be reflecting the sky and all surrounding, It needs to be all over the top, like a real sky would be. To do this I created a cylinder big enough to cover the whole scene. In the drop down menu, in th editor I changed it to 'standard' which allows you see inside it in perspective mode. I then found an evening sky image and assigned it to the cylinder. Here is the complete scene.

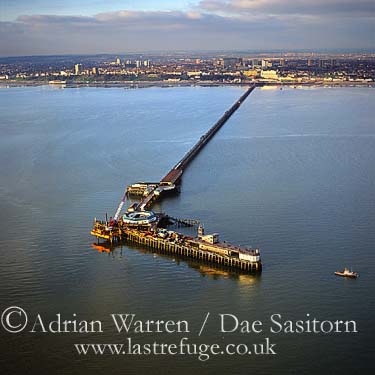
Southend pier
Southend Pier is the longest pleasure pier in the world. This makes it unique to Essex and may entice people to come and visit.
I decided to model this from a few reference photos. I used this photo to give detail on the supports and cross members:

And this photo for the platform...
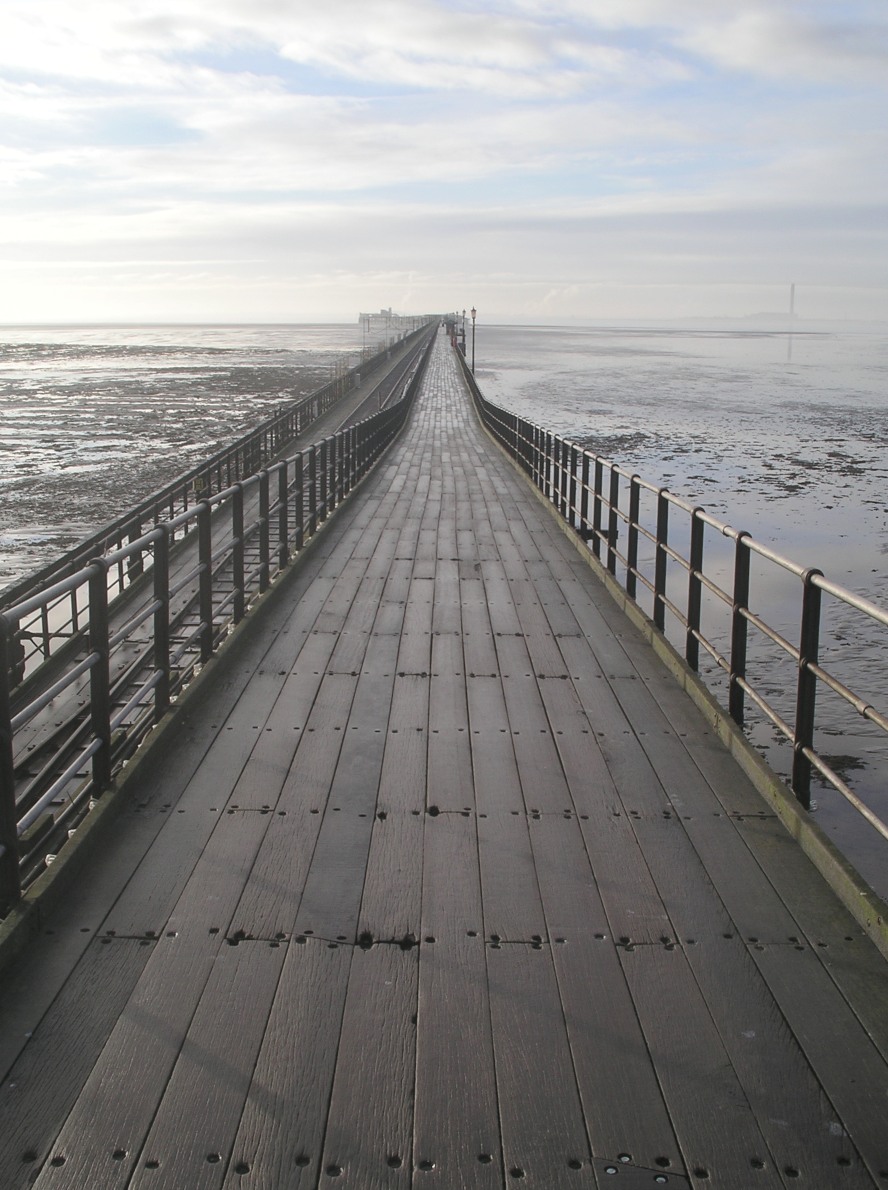
I decided to model this from a few reference photos. I used this photo to give detail on the supports and cross members:
And this photo for the platform...
train and cameras in the station...
I decided to liven the scene up a bit by modeling a rough train. This train was set to be a through train, so it would just speed through the station, wobble the camera as it went. I didn't spend too much time on the train as I knew it would just be seen for a split second. I think this turned out ideal.
I pressed control + C to set the camera from the veiwport veiw. As the train rushes by it wobbles the camera. I did this using the autokey and in very short succesion, slightly rolling and panning the camera. I set the train to travel from just left of the scene to just right of the scene. I set the keyframes quite close so the train would travel at high speed between these points.
Here is the train half way through modelling...

The fourth omni light was also in position to light the facing side of the train.
This screenshot also shows the reflection raytrace in place on the train tracks.
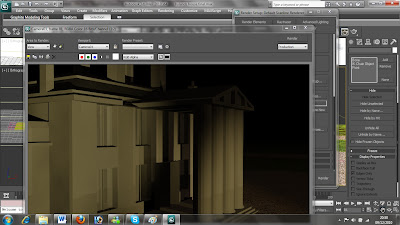
Here is a final screenshot of the train and station taken from the video:

I pressed control + C to set the camera from the veiwport veiw. As the train rushes by it wobbles the camera. I did this using the autokey and in very short succesion, slightly rolling and panning the camera. I set the train to travel from just left of the scene to just right of the scene. I set the keyframes quite close so the train would travel at high speed between these points.
Here is the train half way through modelling...

The fourth omni light was also in position to light the facing side of the train.
This screenshot also shows the reflection raytrace in place on the train tracks.
Here is a final screenshot of the train and station taken from the video:

Chelmsford Train Station...
This was added into the animation to show that essex is set in an idela location. You have the beauty of the rural landscapes (which will be modelled), yet it is still close to London and other areas that can be reached by a short train journey. I decided to model Chelmsford train station...
I started by finding some reference images from as many angles as possible...


This also showed the colour scheme and materials that it is constructed out of which will be very usefull.
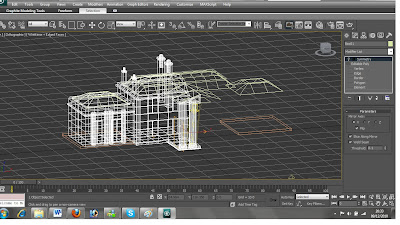
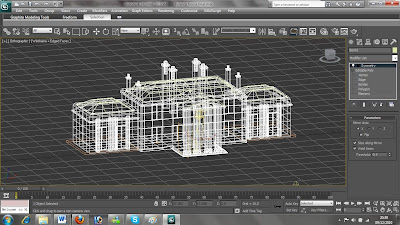
I started the modeling with boxes. I made he platforms first and dedicated one perspective veiwport to the final scene. This way i could work in all the others, but the final scene veiwport always stayed the same so I could see what it would look like at the end. I wanted the camera to be positioned looking over the track but still be focused on the other side where all the detail will be.
I used editable boxes as it was all very angular. The iron railings were created by creating one and copying it several times. I used a reflective raytrace on the windows and advertising signs.
Here is a final screen shot after adding a material to it.

I believe lighting plays a massive part to get it to look realistic alongside decent materials. As far as lighting goes, I used omni's I set up 4 different omnis which can be seen in this screenshot. That may seem a tad excessive, but I altered the intensity, colour and what is affected by their shadows to give the final outcome.

Omni number 1 is in place with the highest intensity. This is to give the impression of the sun coming from the back of the station as if it evening time.
This is slightly orange/yellow to give the evening sun colour.
The raytraced shadows are turned on and effect everything. Once i Had applied this alot of the main scene was in shadow.
I added omni number 2 and 3 to act as lights under the shelter. This lit everything up inside the station but was not quite as intense so it didn't wash everything out. These show the texture on the platform well.
The fourth omni was put in place to light up the train tracks and create realistic shadows.
I think the lighting turned out veyr well on this scene and it gives a great effect.
I started by finding some reference images from as many angles as possible...
This also showed the colour scheme and materials that it is constructed out of which will be very usefull.
I started the modeling with boxes. I made he platforms first and dedicated one perspective veiwport to the final scene. This way i could work in all the others, but the final scene veiwport always stayed the same so I could see what it would look like at the end. I wanted the camera to be positioned looking over the track but still be focused on the other side where all the detail will be.
I used editable boxes as it was all very angular. The iron railings were created by creating one and copying it several times. I used a reflective raytrace on the windows and advertising signs.
Here is a final screen shot after adding a material to it.

I believe lighting plays a massive part to get it to look realistic alongside decent materials. As far as lighting goes, I used omni's I set up 4 different omnis which can be seen in this screenshot. That may seem a tad excessive, but I altered the intensity, colour and what is affected by their shadows to give the final outcome.

Omni number 1 is in place with the highest intensity. This is to give the impression of the sun coming from the back of the station as if it evening time.
This is slightly orange/yellow to give the evening sun colour.
The raytraced shadows are turned on and effect everything. Once i Had applied this alot of the main scene was in shadow.
I added omni number 2 and 3 to act as lights under the shelter. This lit everything up inside the station but was not quite as intense so it didn't wash everything out. These show the texture on the platform well.
The fourth omni was put in place to light up the train tracks and create realistic shadows.
I think the lighting turned out veyr well on this scene and it gives a great effect.
Adding windmill to a scene...
Now i began to think about where the windmill would be situated. I decided to place it in a field on a hill over looking more rolling fields. I tried to make it as realistic as possible.
I started by creating a flat box as the ground. I played around with the vertexes, pulling them up and down to create an un-uniform plane. The plane slopes away at the rear to give the effect of a hill.

I added an image to a plane for the background and positioned it realistically. I then went about adding a grass texture to the ground. I tried a few but as it was a large area or grass, the grass would require tiling and this looked awful. I decided to make a huge seemless texture on Adobe Photoshop. I adding some brown to it and leaves using a brush. This was than applied to the ground. I am pleased with how it turned out. I also added some foliage and made them irregular by playing around with the prune tool and adjuster size and rotational angle.
Here is the graas texture I created:


Adding a material to the windmill...
Now the model is complete I began to add a material to it by using the material ID's. This allows me to assign different materials to one object by selecting polygons. In the material editor I chose sub/divided object. I began to assign different materials. Here is it materialised...


Tuesday, 7 December 2010
Thaxted windmill...
I began by starting to model the windmill that is located in Thaxted. It's of brick construction with wooden panels. I took this into consideration when modeling. Here is a step by step guide of how I created it...
I started with a cylinder and selected the top poly. I could then use the scale tool to make this poly smaller, creating a cone shape. This gives me the base of the windmill.

To create the indents, I connected the top edge with the bottom edge which creates a new poly in the middle. This can then be extruded inwards to give the effect of indents in the brick work.

I copied this around the edge of the cylinder and played around with the shape some more.

I added turrets and a domed roof, using editable poly cylinders and a sphere which i put into place and then attached to make it one.

Now i had the rough shape of the body. I could begin to model the 'fan blades' i started with a flat box and long thin box, I then attached them together and deleted some polygons in the flat box to make it look realistic.

I positioned it correctly and copied the part 4 times and adjusted the rotation. This finalised the 'fan blades'. I attached these 4 shapes together so that when I came to assigning materials It would make it much easier.

A nice touch which I saw on a few windmills was rope hanging from the fan blades. This Would also give me a chance to experiment with new methods and try out newly acquired skills. I started by selecting the line tool (under splines). I changed the intial type to smooth to give the effect of rope hanging and drag type to bezier. I could now Drag the vertexs to where I wanted them to make it look as if the rope was falling off of the blades. I could now adjust thickness to give the splines a 3D element. Under the rendering heading, I changed the radial thickness to 3.

The windmill model is now complete.

Monday, 6 December 2010
Starting modelling...
Now we each had some scenes to model, We set about preparing images for reference. I wanted to make a generic windmill to show that there are many situated throughout essex.


I can begin modelling.
I can begin modelling.
Beautiful Scenery in Essex...
We started to brainstorm places that Essex is famous for and places that are of beauty. We also asked family and friends for their opinions of what places they think essex is famous for, aesthtically pleasing or unique. After collecting the results we compiled a list of scenes to model:
Southend sea front
Maldon
Burnham on crouch
Thaxted windmill
AR university
Chelmsford train station
Northweald track days
Northweald airfield
Hylands house
Viaduct
Beautiful rolling fields
Hadleigh Castle
Beach huts
Shoeburyness
I started to collect some images from the internet of landmarks and scenery in essex that would promote the county and that I could use for reference when modelling...


![]()


.jpg)


Now I had collected some relevent images I could begin to model.
Southend sea front
Maldon
Burnham on crouch
Thaxted windmill
AR university
Chelmsford train station
Northweald track days
Northweald airfield
Hylands house
Viaduct
Beautiful rolling fields
Hadleigh Castle
Beach huts
Shoeburyness
I started to collect some images from the internet of landmarks and scenery in essex that would promote the county and that I could use for reference when modelling...
Now I had collected some relevent images I could begin to model.
Subscribe to:
Comments (Atom)