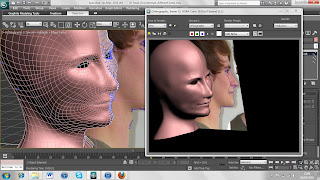
when we was given the task I felt optimistic as I felt I was not ready to undertake such a large project. Once I began follow the tutorials it began to come alot easier to me. I felt my skills and knowledge of the programme increase dramatically as I modelled on. I think I got so familiar with the programme as I knew it had to be spot on, which meant alot of going back and redoing parts of the head. This meant I could get used to the different tools and options.
I am most pleased with the face shaping. I think it looks relatively like me. This is the part that I redid a few times to get in perfect. I spent alot of time on this paying attention to detail and I think it has payed off.
I found the hair the hardest to completely realistically. It still doesn't look good and I believe it lets the rest of the model down. If I had more time I would definately concentrate on this part getting it to look better.
Overall I am pleased with the model. It was completed in a fairly short amount of time and the tools and techniques were fairly new to me.
Friday, 22 October 2010
The hair...

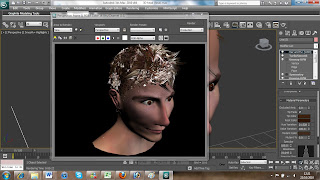
Now I had the fun task of applying some hair to the model. Now I had previously heard from class-mates that it was a very stressful process. I set about it with not much hope and to be honest the final outcome reflects my first thoughts. I used a preset as I could not achieve the correct thickness. I styled it by cutting it shorter and combing it to loosely resemble my own hair. Once i had done this I began to play about with the colour. Even though the root colour, tip colour and mutant colour were all set to a dark brown shade, It still came up very light. I switched the glossiness off as i thought it may have been reflections that made the hair bright, but this made no difference. I am not happy with the hair, but atleast i gave it a shot. This was bar far the most stressful part of the project and the part that lets it down most. The hair can only be rendered in perspective veiw which screwed up the proportions of the face. Anyway, here is a screenshot to show the finished article...
the completed eye...
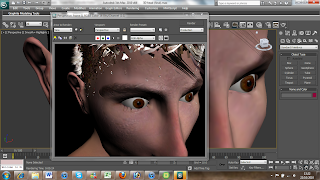
Here is a screenshot of the completed 3D eye with material. I didn't apply a bump to this as the eye is very smooth. The only alteration i made was to increase the glossiness. This made it look like the eye was shiney as they do in real life. I think overall it came out well, but I would have made the eyelids more prominent if I had more time as it makes it looks like I am either very surprised or staring!
The eyes...

The eyes where created at an earlier stage, so here is how I did it. I started off by creating a sphere and resize different axis's to make it fit into the eye socket. Once i had got it to fit, I found an image of an eyeball on the internet and opened it up in photoshop. I have brown eyes, so i played with the brightness, contrast and hue until it looked simialr to mine, the white of the eyes was also way to bright. I adjusted this too so it didn't make my eyes look to promenant when applied to the sphere. Here is the photoshopped eye material. I had to stretch the eye so that it wokred with the unspherical 'sphere'. It now looks circular on the model.
The model with material...
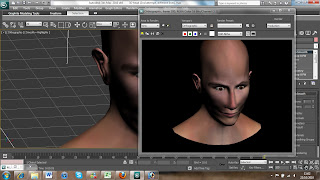
I next applied the material to the 3D head. I did this by using the material editor. The 'diffuse colour' option was used and a bitmap (image) was added. To make the skin more life-like and feature a texture i used the same bitmap on the 'bump' option. This allowed all of the imperfections, bumps and spots to become 3D. Here is the model with the added material. I am pleased with how it turned out. Having the actual face material stretched over the 3D head makes it look much better in my opinion. It brings out all the bumps and features on my face. I am happy with the turn out of this.
The complete material...

Here is an image of the complete material ready to wrap the 3D head in. From this veiw it looks very weird and uneven, but whe applied it looks realistic as the skin on my face is not smooth and monotone. It has many different tones and textures. I didn't include hair on the material as this will be added later using the hair and fur tool.
Making trhe face material...
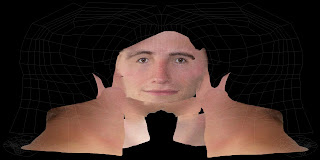
I began to copy parts of the original face to the template. I used the marquee tool and the ctrl+c and ctrl+v shortcuts for quickness. Here is a progress picture to show how I did it. I found this fairly straightfoward, but very time consuming. This was because the skin tones and shades vary alot and trying the match and blend them takes some time. Another tricky part was trying to match up the seams, as these will be joined when the material is put onto the model. i could see an update of this by saving the file as a PNG then switching to 3ds max. The updated material could then be seen in the veiwport. Here is an image of the material that is applied, but not complete.
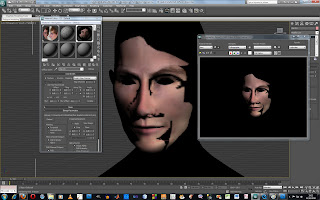
Apply the face to the UVW template...
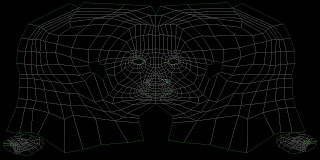
Now that i have the template of the 'unwrapped' face, I can open it up in Photoshop. This is currently in PNG. format so it does not open with a background. I added a black background to it as the bottom layer. This made the template visible. I could then begin to add the pieces of the face behind the template and align them.
Wednesday, 20 October 2010
uvw unwrap...
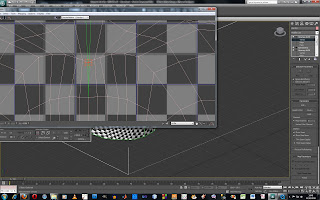
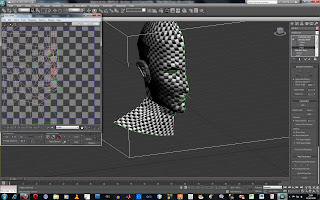
Now the tricky part begins. I have to use the uvw unwrap tool so that the face material is layed out correctly and looks realistic. The hardest part is trying to get all of the chequers to sit uniformly. I spent alot of time doing this and I think it has paid off well. Here is a progress screenshot. I then had to use the symetry tool to complete the other side of the head. I then edited parameters once again and it bought up the UVW map. I could now mirror the completed side and use the traget weld tool to weld the vertices to make it one solid template.
Monday, 18 October 2010
The final 3D head...
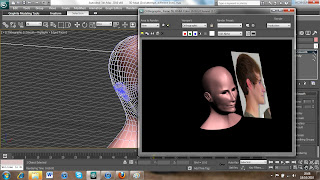
Here is the final 3D head. The fitting of the ears were by far the hardest part so far in my opinion as it was so tight and hard to see. I attached the ear to the head by welding the vertices. The head/face/ear/kneck is all one part now. Next up, I have to apply a material using the UVW unwrap tool.
Creating the ear...
wideneck...
progress with head...

I have continued to perfect the face and have now gone on to start to construct the head and neck areas. This took me very long time as the lines of the head did not match up with those of the neck and face. I spent a long time moving, adding and deleting edges and eventually finished it. Here is where I am upto now. Next up the ear needs to be completed...
Tuesday, 12 October 2010
Perfecting the lips and nose...
Monday, 11 October 2010
Progress...
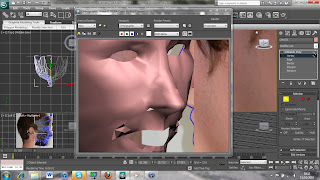
I'm beginning to make progress on my 3D head. When I first pulled all of the polygons to the front, I realised the head looked appaling (I mean VERY bad) Then i started to veiw it from all different angles and concentrated on the bridge of the nose. I made the nose wider and it started to look more realistic. Here is a screenshot of the progress...
Sunday, 10 October 2010
Problem Solved...
After chatting with Richard, the problem of the pixleated image is now solved. I have now been working my way through the rest of the guides and now have started to add the mesh and pull out the editable poly into the face shape.
Sunday, 3 October 2010
Poor quality image...
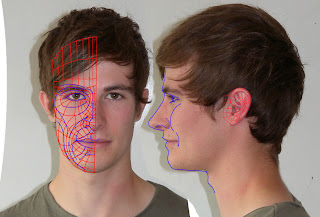
I am currently having issues with image quality. The photoshop image of my face is very pixleated. This means when I zoom in to add the lines I cannot work out what line goes where etc... I have tried to source an answer to this problem, to no avail. Work is on hold until I can ask Richard for some answers.
While I'm waiting, here shows my topology for the head. I used the pen tool and followed the flow of the features of my face. I created many quads that will eventually be used to '3D' the head.
Subscribe to:
Comments (Atom)


